Beauty Routine Q&A

5 Years Later: A quality routine never dies and with slight adjustments or no adjustments, never goes out of style...
I get asked in person and emailed via my blog, Facebook, etc… about my makeup and skin care routine really, really often. Especially by people I work with all day who wonder how my makeup stays perfect and fresh not only from when I apply at 6:00am but even through after work drinks well until 2:00am the next morning. Over 24 hours of non-creased perfect worry free wear and people will start to inquire. And I am always willing to share. I like for everyone to feel really comfortable and be able to do what they want with their makeup so I always give up my “secret” tips. So for my friends who have asked repeatedly but I haven’t had time to bring my box of goodies over, this is for you.
1>>> My skin care routine.
This is really important because a great makeup routine starts with a good base. You can do some cool things with makeup but you can’t cover everything. My routine is pretty natural so I always try to keep my base in good condition… aka, my face. I’m not advanced enough to do the full on 100% acne cover up I’ve seen on YouTube. Which is fricken AMAZING by the way! I wish I would have known about that in high school.
The good news is there are some things you can reverse. And if the natural tips below don’t help you out because it’s too late, there is always Botox. I’m not suggesting it blanketed for everyone; I’m not pushing it. It’s a personal choice. But I know that’s going to be my fall back one day and I’m not afraid to admit it. My only tip here is not to start too early because it can cause premature facial sagging and make sure you go to a well-known pro. Don’t go to some weird chop shop or you can end up with permanent damage.
<<<wrinkles >>> This could be pretty boring if you already do these things or if you don’t have wrinkles, so if you want to know about my makeup “secrets,” skip to section 2… I am well over 30 years old, have twins, normal job and life stress sort of things, I’m married and I have yet to get a real wrinkle. It’s not because I’m genetically superior. It’s because I keep my face really still. I know this first step sounds insane but it’s free botox. My first tip is whatever face you make… stop it!! Smile with thought so that you don’t make crazy crinkles by your eyes or around your mouth. You know, keep it natural with lots of laughter noise, but rock a happy no wrinkle face. Find a middle ground to get some extra years out of your perfect base.
Further on that subject, I cannot tell you how many dozens of selfies I’ve seen with people who don’t realize they are making those big wave wrinkles across there forehead. When I skip through there other photos 99.99% of the time they are permanently there. And somehow they don’t even see it! It’s the biggest flat canvas area on your face. Put the camera lower or relax your forehead or something! It looks bad and it sticks over time if you have that habit.
I can tell you, making a wrinkle anywhere on your face over and over does make it stick. They didn’t only say “if you keep making that face it’s going to stick” because they were scaring kids into being good. It was also a cautionary quote from mothers to daughters. The face you keep making is going to stick!! So stop it!
I too had this problem and was causing my first deep wrinkle. I have this insane stress sort of tick where I make a certain skrinchy face when I’m hella stressed out. I noticed after a few months I had this deep odd wrinkle forming between my eyebrows and freaked out. I made a couple faces to figure out the one and finally one matched the crease. It’s hard not to do it, but since I stopped, it has gone away 100% because I caught myself early.
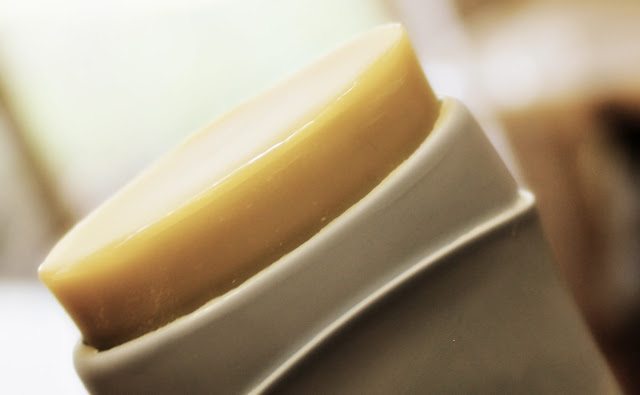
<<<moisture >>> Heavily moisturize 24/7. I use Cetaphil cream. I actually use it from head to toe. It’s the thickest thing you can imagine and it has kept my skin soft and smooth. Even when I wake up in the morning if I’m going to hang around at all, I reapply first thing and again after showers and any time I cry a lot from a sappy movie. I never let my skin dry out.
2>>> My Makeup Routine.
There are some products you can go cheap on with the right bases and some that if you cut corners you’re going to be in the bathroom wiping the eyeshadow crease out within a few hours if not within the first hour of wear.
Now you don’t have to try and rock my personal style by any means. You may even hate it and that’s cool. It’s my own thing that I threw together over time and I like it and it follows the rules. But you might want to grab a few of these products so you never have to worry about flaking or movement.

<<<step 1 >>> I cannot live without Bare Minerals Original PrimeTime. After I put my Cetaphil lotion on I apply one pump of it all over my face. This will keep makeup from settling in any fine lines or wrinkles and will make everything you put on stay in place all day. It’s natural, soft and you can’t even tell you’re wearing it.

<<<step 2 >>> I use Urban Decay Eyeshadow Primer Potion. This is the most important thing in my bag. If I had nothing else for bases I would freak out if I didn’t have this. Your eye makeup will not go anywhere for well over 24 hours no matter how decadent, smoky and thick. I apply from my brow all the way to my lashes in a quick light coat and in the corner of my eye because I add shimmer there later.
This is so good you want to make sure you know how to apply your products because where you put them is where they are going to be. Even with a Qtip, makeup remover and trying to go in tight for little fixes, it will still hold onto stains. It’s amazing! Obviously if you are lining under or doing cool under smokey eye effects, put it in those places you’ll be applying shadow too.

<<<step 3 >>> I use the Original Bare Minerals foundation powder only on spots that need evening out and I top it with the Mineral Veil. I personally use the original formula because I like the shine. I think matte [and this may just be me] looks dry and dull. I like to have that youthful glow but it is a personal choice.
I never reapply powder during the day. If my face is ever getting too shiny I use blotting sheets and call it a day. No way I’m mixing oils with new powder and rubbing it all over my skin. I just pat and stay fresh all day. This keeps me from getting even the smallest little skin blemish and I straight up had acne in high school.
If you need to, this is an area where you can skimp and save on the $$. Or if you have acne or scaring problems you can pile on your fave foundations. As I’ll repeat below, if you have the two primers you’re good to go. Those are the two most important parts of your routine.
<<<step 4 >>> Now that my base is all perfect and set I start building. The secret to good makeup is to follow your natural shadowing. I see people not put any makeup color in the crease but put a bunch of dark brown on the lid. It looks off because you naturally have a darker crease and lighter lid and then a super bright brow bone. You can change the colors around any way you want if you just follow your faces outline. Dark for dark and light for light. It’s super beginner proof. If you throw on a bunch of foundation and don’t add color back to your cheeks it makes you look weird and pale with no definition. A face isn’t supposed to look like that. This is the difference between an amateur “threw on whatever” look and a tailored professional look with your makeup.
We’re just bringing out what we already have when we wear makeup and maybe even having a little fun with color and swagger in the meantime. Just try and remember the most important rule… you can’t bring out one thing and not another. If you have heavy eyeliner you need darker longer lashes. If you even out facial tone with a ton of foundation you need to add your cheek color back in. Miss any of these crucial steps and you end up looking off. Other important definition fades away.

For my shadow I first throw a light color on my lid. For regular wear I’ll do a pale pink or purple. If I’m feeling really Emo I’ll go to my UrbanDecay Electric palette and put on anything from neon pink to Elmo blue. Then throw a darker color in the crease of any kind. I personally use a stark matte black mixed with a cream color to slightly lighten it. Then I blend white on the top to make the line less harsh and highlight my brow bone.
This is another area where you can go cheap. If you have the good bases you can use any shadow you want and it’s going to stick and stay in place. The investment if you can’t have it all should always be in the bases that you use.

Now I go in for my throwback wing tip eyeliner. I use Kat von D’s Tattoo in the darkest black. The proper way to start a wing tip or any type of liner is to start thin at the inner corner of the eye and go up thicker towards the outside of the eye to create a cat eye.

Otherwise you could end up with weird looking eye shapes. Even if you aren’t doing wing tips your eyeliner shouldn’t be strait and even across unless you just want your eyes to look the same shape. For me cat or almond and looking open is the way I like to go so it’s thin to thick for me.

Finally I add a small shimmer white shadow just in the corner of my eye in a little V shape. This brightens eyes and makes them look incredibly awake. It really helps immediately lift tired eyes. So all these steps are lifting and opening the eye making you look more youthful and more awake.

Also very, very important is how to properly hide dark circles under eyes. You don’t add a bunch of heavy foundation that matches your skin because it will still be darker than the rest and then call it a day.

I personally use Benefit Eye Bright stick. It reflects the light out of the dark circle so it’s like you erased them. I lightly add ONLY to the dark places. Not in one insane swoop under my entire eye unless you have a complete dark under eye. I have the smallest spot under both eyes just towards the inside corners. That’s the only place I apply mine.
<<<step 5 >>> Now I knock out my mascara. If you buy the Urban Decay Mascara Primer you can buy any brand in the world and it will stay all day. If you don’t want to spend the extra dough try like crazy to find anything waterproof. It sticks way longer and keeps from flaking. Just be gentle and use an oil based cleanser when you wash it off. The problem with waterproof is that you can break your lashes. So let them soak and clean gently.

<<<step 6 >>> Shaping the proper cheek. I use Warmth from Bare Minerals. It’s a brick tone red. Again, with the right base you can grab any brick tone red blush or sculpting brand you want. I only use a dab on my brush and I very, very lightly add it under my cheek bone to make the actual cheek bone stand out, then a dab on my nose, chin and forehead to add a touch of nice color where the sun would normally kiss your skin in the spring and summer. It really adds a nice youthful pop of color. The kind you can lose as you age and the kind that disappears when you apply foundation.

Then I go in with a pop of bright pink just on the apples of my cheeks for a really youthful touch. I also add that same touch of pink again on my nose, forehead and chin.

Finally I use an insanely small grain shimmer called Naked on the tops of my cheek bones up to my temple.

You can’t see/see it. It’s not glitter. It just adds a youthful glow to your skin that makes you look bright and fresh.
### And that’s it! It sounds like it takes a lot of time but I am no pro. I use really quick and simple techniques for beginners. I’m not the one with the Mac this number brush and then the Mac that number brush and blending a half dozen colors to make awesome effects. Any time I’ve ever tried that I’ve ended up taking a lot of time and looking really horrid. Now that I’ve been doing this routine the past few years, it literally takes me 10-15 minutes in the morning and I’m out the door. ###
So there you have it. And believe me, this isn’t a “do this it’s the best” kind of thing. It’s just out here for people who ask because I’m always really happy to share what works for me. If it works for you awesome!! If you hate it… try YouTube. There are so many amazing videos where you too can take away a little of this and that and end up with your perfect preferred routine just like I did over the last decade.